Film Handling · 7 min read
How to Cut 35mm Film Negatives Safely
A practical guide to identifying frame lines, handling negatives, making clean cuts, and storing 35mm film after scanning or development.
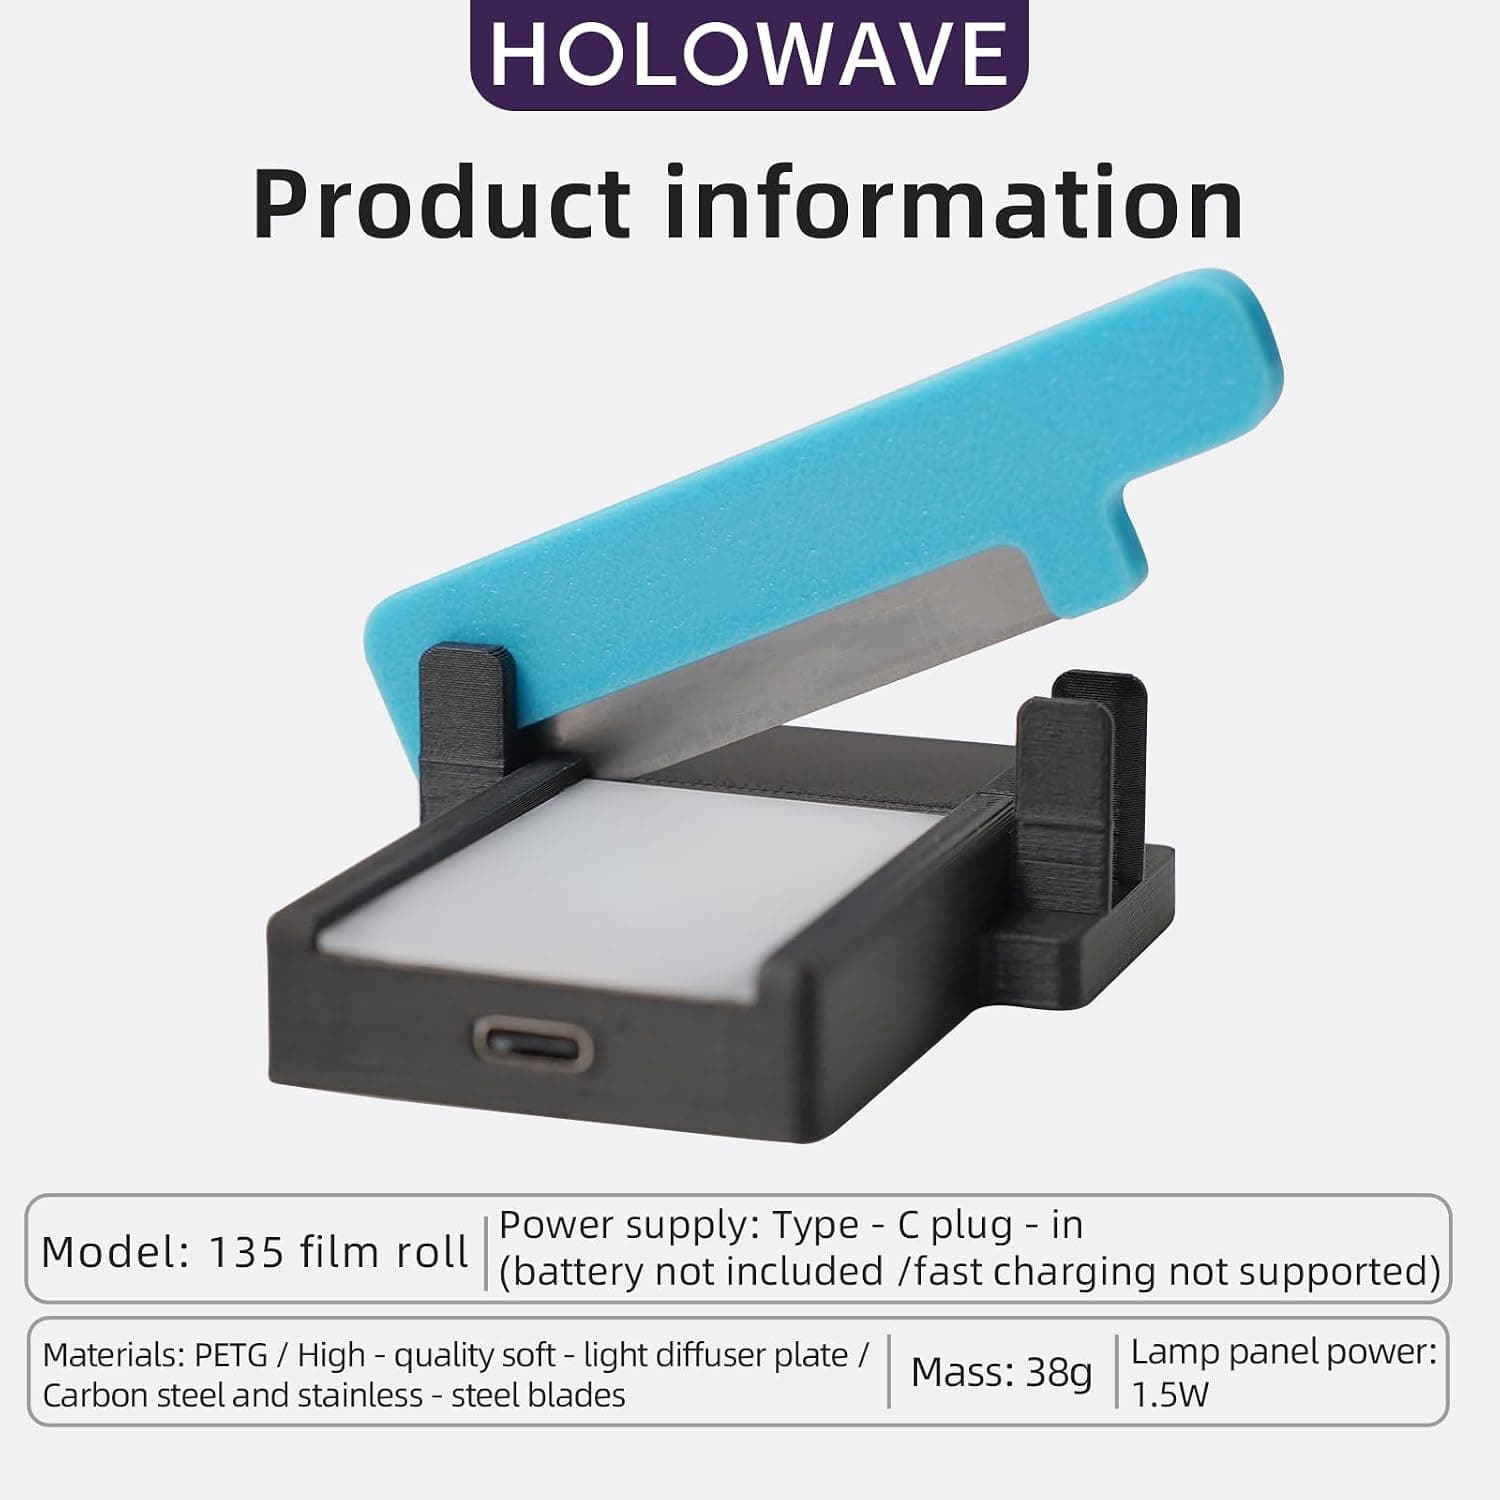
Cutting developed 35mm film looks simple, but a rushed cut can slice into a frame, add fingerprints, or leave an edge that catches in an archival sleeve. A clean workflow depends less on force than on visibility, stable positioning, and careful handling. The method below works whether you are preparing negatives for scanning, filing processed film, or trimming a strip for a film holder.
Prepare a clean, well-lit workspace
Work on a dry, uncluttered surface away from food, drinks, open windows, and fans. Dust that settles on film before storage may later become visible in a high-resolution scan. Wash and dry your hands thoroughly, or wear clean lint-free gloves if you are comfortable handling film with them.
Arrange the film sleeve, cutter, air blower, and labels before opening the negative roll. This prevents you from laying loose film on an unknown surface while searching for supplies. Avoid touching the emulsion or image area; hold the strip only by the perforated edges.
- A clean film cutter or sharp photographic scissors
- A diffuse light source or illuminated cutting surface
- An archival negative sleeve sized for your filing system
- A manual air blower and a soft, clean brush if needed
- A marker or label for roll number, date, and film stock
Find the true gap between frames
Do not estimate the cut from the sprocket holes alone. Frame spacing varies slightly between cameras, and the final frame may not align with the perforations in the way you expect. Place the film over an even backlight and look for the transparent boundary between two exposures.
Very dense negatives can make the boundary difficult to see. Tilt the strip slightly or shield stray room light so the illuminated gap becomes clearer. If two frames overlap or the spacing is unusually narrow, leave extra film around the image and use a larger sleeve section rather than risking the photograph.
Make the cut
- Hold the strip by both edges and lay it flat without pulling it under tension.
- Align the transparent frame gap with the cutter guide. Check the frame on both sides of the cutting line.
- Keep the film square to the blade so the finished strip enters a scanner holder or sleeve easily.
- Make one deliberate cut. Avoid repeatedly nibbling at the edge, which can create small plastic fragments.
- Inspect both new ends under the light before moving to the next section.
For common archival pages, strips of five or six frames are convenient, but the right length depends on your scanner holder and storage sleeve. Decide the strip length before cutting the first section so the whole roll remains consistent.
Clean and sleeve the negatives
Use a blower to remove loose particles. If a particle remains, use a dedicated antistatic film brush with very light contact. Avoid household tissues, clothing, canned air, or improvised cleaning fluids. Canned propellant can spit residue, while ordinary paper products may scratch the emulsion.
Insert each strip into an archival sleeve immediately after cutting. Keep the emulsion orientation consistent and label the page before putting it away. Store negatives upright in a cool, dry, dark location. A careful filing system saves time later because every scan can be traced back to the original roll and frame sequence.
Common mistakes to avoid
- Cutting from the front without backlighting the frame boundary
- Holding the image area between bare fingers
- Using blunt scissors that bend or chew the film edge
- Making strips longer than the scanner holder or sleeve pocket
- Leaving cut negatives exposed on the desk while finishing the roll
Frequently asked questions
Questions about this workflow
How many frames should I leave on each 35mm strip?
Five or six frames is common, but match the strip length to your archival sleeve and scanner holder. Consistency matters more than a universal number.
Can I cut negatives before they are completely dry?
No. Wet or tacky emulsion is easy to mark and can stick to surfaces or sleeves. Let the film dry fully in a clean, dust-controlled space first.
What if there is no visible gap between two frames?
Do not force a cut through uncertain image information. Leave the frames connected and use a longer storage section or a holder that accepts the strip.